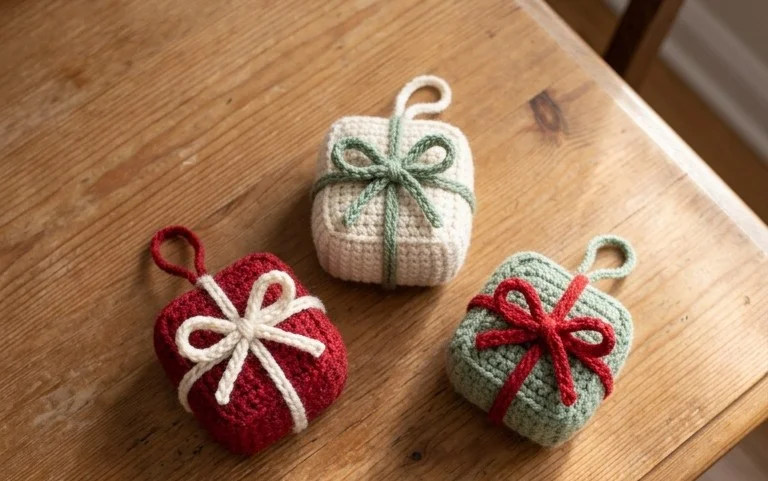
Easy Crochet Christmas Present Ornament Free Pattern
A small, gift-shaped ornament sitting on your tree adds a cozy touch that brings back memories of childhood holidays. These little squares feel dense and plush because of the tight single crochet stitches, which hide the stuffing inside perfectly. You will find that constructing these creates a clean, blocky shape without needing extra shaping or complicated color changes. This project works well for anyone wanting to clear out leftover yarn ends while creating handmade decor. You will learn to manage a continuous spiral and use simple increases to build the boxy sides of each tiny gift ornament.
Why Crocheters Love It
This beginner-friendly project works up quickly, making it an ideal choice for last-minute gift-giving or testing out new color combinations. Because it requires only a small amount of yarn, it serves as a practical way to use up leftover scraps from larger blankets or garment projects. The repetitive nature of the single crochet stitches creates a meditative, rhythmic flow that allows you to work without needing to stare constantly at the pattern. Many crocheters find this design particularly satisfying because the structure remains stable even when using different yarn brands.
I managed to finish this project in a single evening while watching a movie. The instructions are incredibly clear for a beginner, and it looks professional once completed.
— Sarah, hobbyist crafter
Pattern Overview & Skill Level
- Skill Level: Beginner
- Approximate Time: 2 to 3 hours
- Construction: Amigurumi-style continuous rounds starting with a magic ring, finished by sewing closed
- Finished Dimensions & Sizing: Approximately 4 inches tall by 3 inches wide
Materials & Supplies Needed
- Yarn: Worsted weight (#4) acrylic or cotton yarn, approximately 50 yards in total.
- Hook Size: 4.0 mm (US G-6).
- Notions: Tapestry needle, stitch markers, fiberfill stuffing, and small scissors.
- Safe yarn substitutions: You may use DK weight yarn for a slightly smaller finished item, or bulky weight yarn for a larger project; however, adjust your hook size downward or upward accordingly to prevent the stuffing from showing through the stitches.
Stitch Guide & Abbreviations (US Terms)
- MR: Magic ring
- ch: Chain
- sc: Single crochet
- inc: Increase (work 2 sc in the same stitch)
- dec: Decrease (work 2 sc together through the front loops)
- sl st: Slip stitch
- st(s): Stitch(es)
Step-by-Step Pattern Instructions
Body
- Rnd 1: Work 6 sc into a MR. (6 sts)
- Rnd 2: Inc in each st around. (12 sts)
- Rnd 3: [Sc 1, inc] 6 times around. (18 sts)
- Rnd 4: [Sc 2, inc] 6 times around. (24 sts)
- Rnds 5-10: Sc in each st around. (24 sts)
- Rnd 11: [Sc 2, dec] 6 times around. (18 sts)
- Rnd 12: [Sc 1, dec] 6 times around. (12 sts)
- Rnd 13: Dec 6 times around. (6 sts)
Assembly
After completing Rnd 13, fasten off and leave a 10-inch tail for closing. Use your tapestry needle to weave the yarn through the front loops of the remaining 6 stitches. Pull the tail tight to close the opening completely. Secure the yarn with a small knot and hide the end inside the body of the project by pulling it through to the other side and trimming the excess.
Care & Washing Instructions
- Hand wash in cool water using a gentle detergent to prevent the fiberfill from clumping.
- Lay the item flat on a clean towel to air dry, turning it occasionally to ensure even moisture evaporation.
- Reshape the item gently with your hands while damp if it becomes slightly compressed during the washing process.
Pro Tips & Common Mistakes to Avoid
Maintain consistent tension throughout the project to ensure the stitches are tight enough so that the fiberfill stuffing does not poke through the gaps. Always place a stitch marker in the first stitch of every round to keep track of your count, especially when working in a continuous spiral. Weave in your ends by traveling through the interior fibers of the piece rather than across the exterior surface to keep the finish looking tidy and professional. If you decide to adjust the size of the project by adding more rounds, remember that you will need to account for a proportional increase in stuffing volume and additional yardage.
Frequently Asked Questions
Can I use a different yarn weight for this project?
Yes, you can substitute the yarn weight, but be aware that changing the weight will significantly alter the final size of the item. Always match your hook size to the recommendation on your yarn label for the best density.
How do I keep my edges smooth when working in rounds?
To keep the appearance smooth, ensure you are pulling your yarn snug after every stitch. Using a hook size slightly smaller than what the yarn label recommends also helps create smaller gaps between stitches.
Is this pattern suitable for someone who has never used a magic ring?
This pattern is perfect for beginners. If the magic ring feels difficult, you can substitute it by chaining 2 and working the first round of stitches into the second chain from the hook.
Am I allowed to sell items made from this pattern?
You are welcome to sell finished items created from this pattern. Please credit the original design when listing your products online to support the designer’s work.
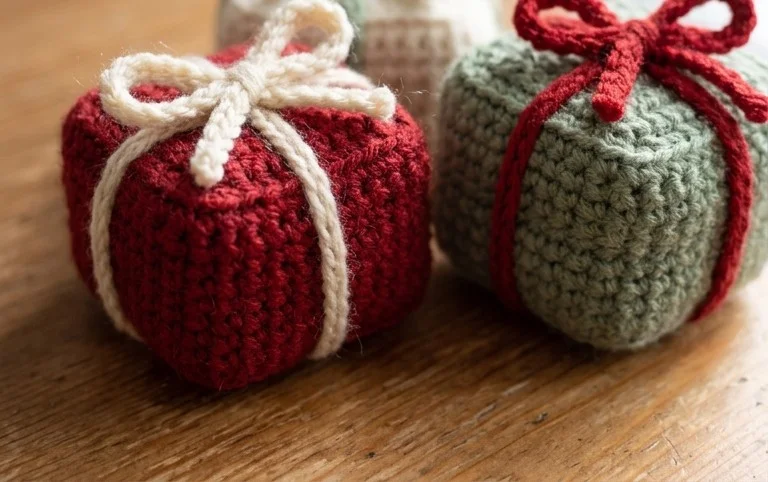
Your finished ornaments look great tied to a branch or stacked neatly on a mantelpiece. You might want to switch to a metallic gold or silver yarn for a shimmer effect or try varying the bow size with a thinner crochet thread. Post a picture of your finished gift set to your favorite social media account so others can see how you chose your color palette. You are welcome to browse the rest of our pattern archives for more quick projects to fill your holiday season.